Hobby electronic links

Since deciding to renew my interest in electronics over the past few months, I’ve tried various websites for supplying components and parts, along with some good sites for learning and ideas. I thought I’d do a quick write up of some of my favourites and put it all in one place.

Firstly, lets start with components. You will always need somewhere to get all your bits from, as well as tools and consumables. Here’s a few sites that I’ve found both handy and reliable. I do like to be able to get everything I need from one place, but I haven’t yet found a one stop shop for everything, but I have managed to narrow it down to just a few that will satisfy most of my needs.

  • Bitsbox – This is a great site to get your basic components from. They are cheap, well stocked, and have a nice simple website to use. You won’t find things like Arduinos, or Sparkfun kits, but you will find just about all the basics you could ever need. Components can be ordered in singles, or bulk, and delivery is pretty rapid. I tend to use Bitsbox to stock up on standard things like resistors, capacitors, common chips, and other non specialist components.
  • Proto-Pic – This is where you go for the more ‘building block’ style components. Things like Arduino, Sparkfun, sensors boards, breakout boards, etc. Great place with a nice easy to use website. I do find that I need to watch my spending here. It is too easy to keep loading up the basket with fun parts, especially shiny things like LEDs. There is a lot going on now in hobby electronics where you buy pre built component modules and link them up for a project, rather than scratch built circuits. Good communication from the staff here, and will part ship your order if they are having trouble with stock, instead of having you wait.
  • Cool Components – Very similar to Proto-Pic. You should be able to find what you want in one of these two stores. I’ve dealt more with Proto-Pic than Cool Components, but more for familiarity than any other reason.
  • Jeelabs – This is a slightly odd case, and is a more specialised shop than the rest. I’ve been working a lot with JeeNodes, and this is the place to source them from. Its a one man shop, but he is designer, builder, and shipper. He also provides a lot of information, not only on how to use his products, but also in general electronics knowledge.
  • Unmanned Tech – Not exactly in the electronics section, but this is where I get my quadcopter autopilot components from. I just wanted to mention it here because the support that is given is great. Very friendly and actually want to help.

Next, lets look information sites. These are places to go for learning more about electronics, techniques, and news.

  • Jeelabs Blog – As mentioned above, Jeelabs provides JeeNodes, along with other modules to go with them. The blog provides a lot of information about how to use their products, how they were designed, and also general information such as circuit design, how to improve your arduino sketches (especially making them low power), and walks you through good ways to measure and bug trace your own circuits. Well worth following.
  • EEVBlog – A great, fun blog by a mad aussie. (Are there any other types?!) He has a regular video blog on a fairly wide range of electronics subjects, including reviews on lab equipment, tear downs of new gadgets, and instructions on circuit design. He’s now making a living from this blog after having many years work experience in electronics. Videos are released on a pretty frequent basis and are well worth a watch just for his enthusiasm!
  • Instructables – This site is just fantastic. People from all over the world with a passion for making things can upload full build instructions to this site for all to read and reproduce. Its not just electronics here either! Anything that involves making things can be found here, from needle work to metal work! The information is free, but it is worth signing up for a full members account which allows you to view the instructables in a single page, rather than multi-page, and also download it as a PDF. Handy for putting onto an e-reader or similar. Great place to look for ideas for projects, or help on something you’re working on.
  • Makezine – Makers are taking over, and this is the place that pretty much summarises the movement.
  • Thingiverse – If you have a 3d printer, laser cutter, or cnc mill (or at least access to one), then you can find many actual objects available to download to be produced. The idea being, if you need something, and design it, you can then upload it to this site for anyone else to produce for themselves. An open source object library.

Thats it for the main part. A few honourable mentions go to RepRap for all your 3d printing needs, and also Youtube. There are many many videos there that are well worth a watch.
 

3d Roadblocks

Okay, its been a little longer than I hoped for for an update, but it has been Christmas so I’m using that as an excuse.

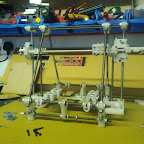
The build of the huxley was going very nicely until I hit a few snags with the kit I’d ordered. Firstly, there are nowhere near enough nuts, bolts and washers provided to complete the kit. I ran out before I’d even finished the frame, let alone mounted the motors, built the extruder, or made the idlers. Huxley

Secondly, the belt for the X axis was too short, so I couldn’t fit that.

Thirdly, the electronics actually burst into flames on me whilst testing and configuring the motors. This was before I’d actually done anything bar plug the power supply in. To say I wasn’t impressed doesn’t quite cut it! Oh, and the analogue to digital converter for the hotend was missing.

So, considering I got a kit for hassle free construction of my first printer, I’m not overly enamoured with it. The UK company have put me in touch with the manufacturer to get things sorted, and they have said they will send out the replacement/missing parts from the states, so hopefully things will get sorted, but I could’ve had a nice working 3d printer by Christmas had everything been right in the first place. The instructions on the wiki also leave a lot to be desired, especially the hotend page, which were for a totally different design. Only one photo showed the model I’d got.

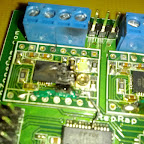
In the meantime, whilst waiting for the replacement parts, I’ve done some research into the electronics available for the various reprap machines, and have decided to build my own electronics based on the generation 7 schematics on the wiki. These electronics all fit onto a single sided PCB, so nothing complicated, and seem to be relatively simple. In fact, I bought a pre-made board off eBay, and had most of the other electronics already ‘in stock’ in my cellar. The gen 7 boards also use pluggable stepper motor drivers, which mean that if one does burn out, then you can simply plug another one in, unlike the kit electronics where everything is surface mounted and impossible to replace.

With all this, I’m hoping I can get a chance this weekend to finish off the electronics and get the main body of the printer working. I’ve built the extruder, mounted the motors, and got all the belts on, so all that is left is the calibrate and level it all, and build the hotend. I’m hoping the hotend will be fairly straight forward, but as I’ve no real instructions, just one picture to go off, I’m going to be very careful!

Anyway, here’s some pictures!

Huxley

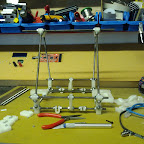
Main frame

Huxley

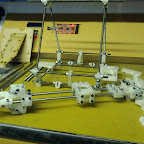
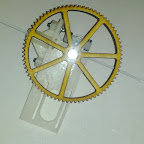
X Axis

Huxley

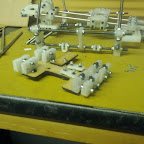
Y Axis

Huxley

Y Axis in place

Huxley

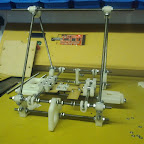
X and Z Axis in place

Huxley

Extruder


In other news, I’ve been rather impressed with how easy Google SketchUp is to use. I’ve been messing around with it to design the parts for me printed quadcopter. For a beginner who just wants to make simple parts to be printed on a reprap, it is perfect. Install the plugin for exporting to STL files, and you can both upload these to thingiverse, and import into most of the 3d printer software that is available for the repraps.

Also, slightly related, I’ve actually had a quadcopter flying with the Arducopter controller. It was only a brief test as I managed to crash it and shatter 3 of the blades. Spare blades only arrived on Christmas eve, so not had a chance to do much more with it. Just waiting for some better weather so I can fly it outdoors. I’ve managed to snag myself and OpenPilot Copter Control board too last week which should be arriving any day. This is a halfway house between a simple KK Multicopter controller, and the full blown ArduPilot Mega. I’ve got the APM telemetry kit coming soon too, so I can take my laptop and get live telemetry from my quadcopter. Unfortunately, my laptop battery has developed a fault, so the only way I’ll be able to do that at the moment is if I can fly it somewhere with a power socket nearby!

So, hopefully next week I’ll be reporting that my printer is done, and will at least have done a couple of nice test prints. I think my first actual things to be printed will be brackets and improvements to the printer tho’.

The construction begins…

Two parcels arrived this morning, one a 2.3kg reel of 3mm ABS filament, the other was a surprisingly small box full of plastic and metal. Otherwise known as a RepRap Huxley 3d printer! A little over 3 weeks past the expected delivery date, but at least its here now.

Unfortunately, work got in the way of me doing much, but an hour of my ADSL being broken over dinner meant I could at least open up and check the contents. I must say, it is smaller than I was expecting, but thats a good thing. This should fit nicely on my desk and not take up too much room. The box contains everything you need to build the printer, bar tools of course. This kit is actually an import from the states, sold through a UK company who I assume buy a load of these and then ship them out locally. It did come with a US power cord on the PSU, but for me that isn’t exactly a show stopper! No instructions are included, instead everything you need is online on a wiki, and in numerous videos supplied by other people who have built them and in true open source fashion, contributed back to the project. In this vein, I’m hopefully going to improve the instructions on the wiki a little. I’ve already spotted a few areas that could be improved.

Wonder how long this is going to take me!?

Huxley

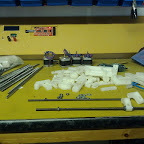
Plastic parts, and metal rods.

Home Monitoring

Over the past few months I’ve been slowly stocking up on all the equipment needed to properly get back into electronics. As I was gathering things together I discovered Arudinos. These are an easy entry into microcontrollers, much simpler in my opinion to PICs, and cheaper than most other developers kits. The fact that they’re open source and open hardware just seals the case. The standard Arudinos are rather nice to work with, but since messing with them on a few mini projects to teach myself about them, I came across a guy who was selling his own custom design, utilising the arduino bootloader and interface, but in a much smaller form factor and inbuilt wireless communications.

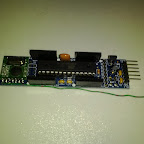
These JeeNodes are about the size of a pendrive, and have an inbuilt RF12B wireless module. Along with the nice hardware design, there are also some easy to use libraries, and a great website to accompany them, with lots of nice tutorials, information, and general geekiness.

Home Automation

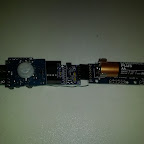
So, where does home monitoring come into this? One of the addon boards that Jeelabs sell are little room monitoring nodes that detect temperature, humidity, and light level. Add a PIR and you’ve got a motion sensor too. The guy behind the JeeNodes, Jean-Claude Wippler, has done some great work on power consumption meaning that these room nodes can run off a single AA battery for nearly a year. There are about a dozen or so of these nodes now spread across my house, logging into a database, and I’ve done some basic graphs to display the data.

Home Automation

Now I’d also noticed another project using arduinos to monitor electric consumption that was also based on JeeNodes, and reporting back to a central server to log into a database. This got me thinking, could I combine these, and maybe more. The beauty of open source is the fact you can tweak and edit to your hearts content. The fact that both these projects used JeeNodes, and more importantly, the RF12B library from JeeLabs, means that I only need one receiving station and a few small edits to the nodes.

To the transmissions I added a node type to the beginning of the data. This defined whether the node was a room node, power node, or any other future node types I may define. Most of the rest of the code was left untouched, except to assign a node number to each node. That was the easy bit.

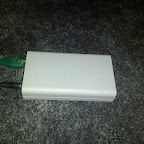
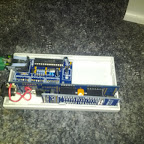
Next I needed a receiving station, and some way to get the data it received into a database. For this I once again turned to the JeeNode. Handily, JeeLabs also sell a nice case for the JeeNode, along with a Ethernet add on. This gives me a very small self contained module that simply needs power, and an ethernet connection. Both the energy monitor project, and the room node project had their own code for a base station, and for getting the data into the database. In the best traditions of open source, I have stolen from both these projects and combined my favourite ideas out of both.

The houseNode sits and listens for any broadcasts from any nodes. It knows about the different types of nodes, and the data structure to be expected for those nodes. When a data packet is received then the node type is stripped out, and the rest of the data put into a structure definition depending on the type. Then a JSON structure is constructed, and sent via HTTP POST to a web server. No acknowledgements of data being received are currently sent, but with future expansions that I have in mind, this will be a requirement.

Home Automation Home Automation

The web server will receive the POST command, and basically dump this information into a database. From this database, a front end can draw graphs and report on anything you want. The front end is very much still in construction, but can be viewed at http://home.22balmoralroad.net/

Future developments I am considering are a thermostat node, to control our central heating, and RFID entry/exit nodes to log in and out of the house. The RF12B modules have a limit of 32 addresses, two of which are reserved. However, 30 nodes should be enough for most of my ideas! It does have the other benefits of very low power, very simple, and the JeeLabs library even has encryption built in. Below are the Arduino sketches for each of the nodes.


My Cellar

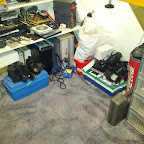
My Cellar, AKA the command center!

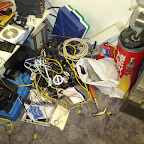
I’ve had a fairly productive weekend sorting out my cellar, ready to crack on with some of my projects, although strictly speaking sorting out the cellar was actually on my list of projects. Besides the standard cleaning up of all the mess, including a good hoovering, was the final vanquishment of the cable monster. I know he’ll come back at some point, but I’m hoping that with enough will power from me to actually put things back where they belong, his return will not be for a long time.

Before (Already was beaten down from his full might about 3 months ago!):

The Cellar

Now:

The Cellar

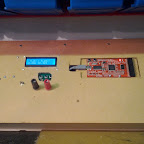
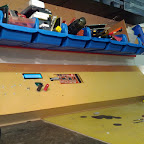
Next on my list of projects down here is the construction of my workbench panel. I want to embed a load of my equipment permanently along the back of the workbench, so for this I knocked up a quick frame that allows me to start mounting some of my tools. So far I have my digital power supply and OpenBench logic sniffer. The digital power supply is one built from a kit available online from Tux Graphics, which is a nice little variable current/voltage power supply, powered by an old laptop PSU, and controlled with an Atmega8a microprocessor. It will also hook up via usb to a computer, but unfortunately a slight design error in the placement of the power switch prevents me from doing this at the moment. The OpenBench logic sniffer is an open source logic analyzer hardware design.

The Cellar The Cellar The Cellar

I also want to embed a few other tools into this panel, such as a multimeter, frequency counter, usb hub, signal generator, and just about anything else that is useful and will cram in here.

In other projects, still waiting for me 3d printer to arrive. RepRap Central said to allow 3 weeks for delivery, but so far it has been over 5 weeks. I’m not impressed at all, and if they weren’t the only place I can find in the uk to get the complete kits from I would be going elsewhere. I’m hoping it arrives next week at some point, as I want to document the build process for this web site. On the quadcopter front, I’m beginning to think I’ve got a faulty controller board, or at least a faulty gyro on the board. I’ve ordered another one to give this theory a test, and if the new one works will get it replaced. Not really going to be a waste of money getting another as I’m sure I’ll be building a few. Once I have this first one off the ground, a bigger better one will be in the pipeline with full arducopter control, which includes gps, telemetry, and full autopilot!

So, thats two posts in to weeks. So far so good! 🙂

Blog writing

OK, I admit it, I’m useless at writing on here. So, now I’ve admitted it, I’m going to try and do something about it. Baby steps at first, but I’m going to attempt to do at least one post or page a week. I’ve plenty of projects going on, and always have an opinion on things, so finding subjects shouldn’t be hard.

Just a few of the things I’ve got on the go at the moment are:

Quad copter – I’m building my first quad copter, and hopefully my next post will be about the first successful flight, and maybe even a video, probably of me crashing it! Just waiting for some replacement parts from eBay. After the first one is built, I’ll be looking at building a bigger and better one, hopefully with a camera on it.

House monitoring – this will be another post, or collection of posts, in my never ending task of proving just how much of a geek I am. I’m aiming to be able to not only monitor the house (and thus make it more efficient),  but also control it remotely. The initial stages can be found at home.22balmoralroad.net. Very much a work in progress.

Electronics – Going pretty much hand in hand with the above two, is my renewed interest in electronics. At the moment I’m very much in the stage of getting the tools together that I need, and learning the cad type software for PCB design. I should have some info to write up on my work area soon.

3d printer – last, but by no means least, I’m awaiting the delivery of my Huxley reprap printer. Have you realised I’m a geek yet?

As well as all this, I’ll no doubt have a rant about various things, including a bit of a write up about my new Nexus Galaxy, when it finally arrives.

Oh, and I’m writing this using the WordPress app on Xoom, which seems quite a nice simple app, and lets me write things whilst I’m in bed without my laptop, because lets face it, everyone thinks best when they’re trying to sleep!

That’s all for now, lets see if I keep my promise!

Bletchley Park

Had a trip down to see Martyn and Em the other week and ended up having a day trip out to Bletchley Park, home of the code breakers during World War II. This is the place where the Enigma code was decoded, and the worlds first programmable computer was produced, Colossus, which has been lovingly rebuilt from eight war time photos and some illegally kept partial circuit diagrams. (It was in England, not America, that the first computer was built. Don’t let anyone tell you otherwise!) Well worth a trip to see, especially if you are in to computers or anything from the WWII era. There are collections of Churchill memorabilia (one couple’s personal collection, put on show for everyone), cinematography, and other similar things. Also, the stately house is open for wanderings which may interest people too

Also, getting started at Bletchley Park, is the National Museum of Computing. It isn’t quite ready for the public yet, but Martyn, being of geek persuasion, wanted to volunteer which meant we got a private guided tour around what was happening behind the scenes. The plans that they have for the place look rather impressive, including a room dedicated to british computing. It looks like there may well be quite a bit of hands on exhibits too, including all the home computers running classic games for you to play. I’m going to make a list of all my old computers (including a very old Compaq luggable) to see if I can make any donations. Not holding my breath, but if I can get rid of a couple of items to a good home that will make me happy!

So, if you are ever in the area and want a good day out it is well worth the trip. You can go back at any point within a year of your first visit for free too which I think we probably will do when the computer museum opens.

Astro Empires / Tribal Wars – Great new way of wasting time!

Recently I’ve been playing a game that Lionel put me on to called Tribal Wars which is very good fun. Basically its a web based strategy game where you build up your village, recruit some thugs, and plunder other villages around you, eventually taking over other villages and growing your empire. To help all this you can also if you wish join a guild and enlist the help/protection of hundreds of other players. The best part of all is the fact that it is set up to play over a very long time. Building and recruiting is done over a span of hours, along with resource build up. This means that you can set something up in the morning, go to work and leave it to run its course.

After playing that for a month or two, I’ve had a look for a different one to play with a more sci-fi theme and have no found one called Astro Empires. The basics are very similar to Tribal Wars except on a larger scale. In this you set up your base and build up your structures whilst researching new technologies. Once you get to a certain level you then start sending out your scouts and outpost ships to colonise new planets. Again you have the choice of joining guilds to help you which comes in very handy if someone decides to attack you! Astro Empires is actually a lot more flexible than Tribal Wars, with a lot more scope for designing your base, the ability to set up trade routes, and also hire commanders with certain skills to help you run your bases.

Both games are free, with the choice of paying for an account upgrade (both offer free trials of upgrades) to give you various benefits such as larger construction queues and an advanced interface. Definately worth a try, click the banner below to play Astro Empires!


Caller ID from Asterisk to all phones, MythTV’s and SqueezeBoxes

Well, I had some spare time and finally got round to getting CallerID sorted on my phones. I’ve had it enabled on the line for a while now, and even had it doing database lookups to display a name on the phone handsets as well as the number, tho’ that broke when I upgraded Asterisk. I have, however, sorted out that problem and expanded everything a little.

Now, when the phone rings, the number is looked up in a database of known numbers, then sent out to all the phone handsets as well as any active MythTV frontend or Squeezebox on the network! If we are watching the TV a box pops up with the time, date, number, and if found, name of the incoming call. Likewise if we are in the library where we can’t actually hear the phone, then the Squeezebox display will change to the name and number and we can decide wether to answer it or not!

All this is done using a feature in Asterisk call AGI, or Asterisk Gateway Interface. This is very similar to CGI scripts found on web pages. AGI scripts are run from the Asterisk dialplan to do various things. In this case the AGI perl script is run and the incoming call number is passed to it. This number is looked up in a database to see if its a known number. Wether it is known or not, the script sets the full CID info in Asterisk.

It then procedes to use a utility call cidbcast that is in the contrib directory of MythTV. This cidbcast sends out a UDP broadcast over the network to any listening machine, in this case the MythTV backend server which has the mythudprelay program running, another one from the MythTV contrib directory. This picks up the broadcast and sends the message to all MythTV frontends using mythtvosd.

Lastly the AGI script connects to the SlimServer which controls all the Squeezeboxes. Talking over the CLI port (9090) on the server it gets a list of all current players and proceeds to send a simple two line display message consisting of the number and name. The majority of this part of the script is a simple cut and paste of the relevant parts of the Squeezebox plugin written by Max Spicer.

All in all this is a fairly simple thing to implement, but is very useful for those as lazy as me!

Script

#!/usr/bin/perl

use DBI;
use IO::Socket;

# MySQL settings for asterisk
my $dbhost = 'localhost';
my $dbuser = 'asterisk';
my $dbpass = 'asterisk';
my $dbname = 'asterisk';

# Slimserver Settings
my $serverAddress = 'mythbe-1';
my $serverPort = 9090;
my $maxVolume = 75;
my $displayTime = 30;
my $debug = 0;

# Mythtv Setting
my $mythxmlfile = '/usr/lib/asterisk/cidbcast.xml';


################
# Get name from mysql for the incoming number
#
$|=1;

#Get the initial data
     my %input;
     while() {
         chomp;
         last unless length($_);
         if (/^agi_(\w+)\:\s+(.*)$/) {
         $input{$1} = $2;
     }
}

my $dbh = DBI->connect ("dbi:mysql:host=$dbhost:database=$dbname","$dbuser","$dbpass") or die "Can't connect to database: $DBI::errstr\n";
my $sth = $dbh->prepare( "SELECT cid FROM known_numbers WHERE source='$input{callerid}'" );
$sth->execute();
@row = $sth->fetchrow_array();
$cidname = @row[0];
print "SET CALLERID \"@row\"<$input{callerid}>";

###############
# Broadcast info to MythTV
my $command;
$command = "cidbcast --once --file=$mythxmlfile 6947 $input{callerid} \"$cidname\" line";
system("$command &> /dev/null");

################
# Send out to squeezeboxes
# Code ripped from Squeezebox CID plugin by Max Spicer
# http://www.thespicers.net/cid.html
#

my $socket = IO::Socket::INET->new (PeerAddr => $serverAddress,
                                    PeerPort => $serverPort,
                                    Proto    => 'tcp',
                                    Type     => SOCK_STREAM)
or die 'Couldn\'t connect to server';

# Get the number of players
my $playerCount = sendAndReceive('player count ?');
$debug && print "$playerCount players found\n";

# Display message on each player and adjust volume if necessary
for (my $i = 0; $i < $playerCount; $i++) { my $playerId = sendAndReceive("player id $i ?"); # Put the players display at max brightness if it's currently 0 my $powerState = sendAndReceive("$playerId power ?"); my $brightnessPref = $powerState ? 'powerOnBrightness' : 'powerOffBrightness'; my $brightness = sendAndReceive("$playerId playerpref $brightnessPref ?"); $debug && print "brightness: $brightness\n"; if ($brightness == 0) { sendAndReceive("$playerId playerpref $brightnessPref 4"); } $cidname =~ s/\s/%20/g; $debug && print("Sending: $playerId display Incoming%20call:%20$input{callerid} $cidname $displayTime\n"); sendAndReceive("$playerId display Incoming%20call:%20$input{callerid} $cidname $displayTime"); # Drop the volume if necessary my $playerMode = sendAndReceive("$playerId mode ?"); $debug && print "playerMode: $playerMode\n"; if ($playerMode eq "play" && sendAndReceive("$playerId mixer volume ?") > $maxVolume) {
    $debug && print "Decreasing volume\n";
    sendAndReceive("$playerId mixer volume $maxVolume");
  }
}
$debug && print "\n";
exit 1;

# Send given cmd to $socket and return answer with original command removed from
# front if present.  Routine nicked from code by Felix Mueller. :-)
sub sendAndReceive {
  my $cmd = shift;
  return if( $cmd eq "");

  print $socket "$cmd\n";
  $debug > 1 && print "Sent $cmd to server\n";
  my $answer = <$socket>;
  $debug > 1 && print "Server replied: $answer\n";
  $answer =~ s/$cmd //i;
  $answer =~ s/\n//;

  return $answer;
}

Database table structure

mysql> describe known_numbers;
+--------+-------------+------+-----+---------+-------+
| Field  | Type        | Null | Key | Default | Extra |
+--------+-------------+------+-----+---------+-------+
| source | varchar(13) |      | PRI |         |       |
| cid    | varchar(26) |      |     |         |       |
+--------+-------------+------+-----+---------+-------+