Polishing the dome

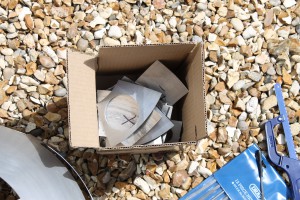
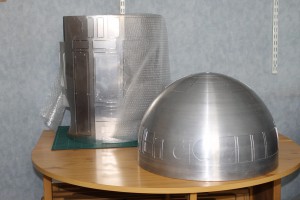
The R2 dome that I got actually consists of 2 domes, one to fit inside the other. The outer one comes pre laser cut to make things easier, with all the various panels held on by a small tab of metal. A quick run with a file or fine hacksaw makes them a doddle to remove. Both domes are produced by a method called metal spinning, which means they have ‘spin lines’ running around them. This doesn’t matter for the blank inner dome as it is mostly hidden, but the outer dome needs the lines polishing out of it to get the correct look. This is a lot of work with wet and dry paper, going from a pretty coarse grit, up to some really fine paper.

Starting with the 240 grit and a large bottle of water, giving the dome a good sand down will remove the spin lines and make the surface rough, but even. Moving up through the different grit ratings slowly (very slowly) smooths the surface over until you get to the 3000 grit. The side product of this is silver hands!

IMG_0171_CR2_embedded_1IMG_0176_CR2_embedded_1

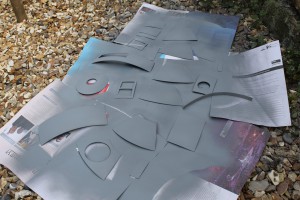
It is all a slow and laborious process, but the end results are worth it. Whilst doing this work, the panels removed earlier needed painting, so a load of paper was laid out and the painting begun. I’ve been using Halfords car spray paints, starting with a grey primer to prep the surface, then a coat of Ford crystal blue, followed by Citroen poseidon blue, and finally a coat of laquer to protect it. It seems the trick is to do light coats, with a little bit of sanding in between with something like a 600 grit paper.

IMG_0148_CR2_embedded IMG_0170_CR2_embedded IMG_0179_CR2_embedded_1IMG_0385_CR2_embedded_1

The end results look really good. I applied a little too thick in a few places, but its all a learning experience for me. I’ve just got a little more polishing to do on the dome, and I need to mask off most of it to let me spray the ring around the bottom of it blue. The next stage is to start cutting the inner dome to allow the panels to open and things to come out. I’m a little apprehensive about doing it, but once I’ve started it it will be fine. But for now, a taster of how it will look:

IMG_0392_CR2_embedded_1 IMG_0395_CR2_embedded_1

This is the droid you’re looking for.

Alright, so maybe a bit of a corny title, but I couldn’t resist.

So, at the end of May we had a trip to Milton Keynes for Collectomania. Besides meeting and getting autographs from Robert Llewellyn and Chris Judge, the other highlight was all the R2d2 droids that were running around. There was a whole collection of different astromech droids in varying states of the build process. Once I got home, and of course mentioned it to she who must be obeyed, I started looking at just how difficult these things were to build.

Initially I joined the main R2 builders club, which also has a yahoo group with lots of useful files and blueprints.The benefit of building an R2 over most other large props is the fact that there is such a large community of people who have already found most of the pitfalls. They also do runs of parts that might be beyond another builder’s skills or too expensive to produce in single units. Unfortunately, most of the talk and production is very America centric, but thankfully there is a very active UK builders group which I quickly signed up for.

After a few weeks of reading (and more reading) the forums I decided I would take the plunge. Mostly I will be keeping a picture log on Facebook and Google+, but will also write up occasionally on here.

I thought I’d first start with what I know, electronics. There are a set of PCBs available that handle all the dome lighting and runs from a single Arduino Pro Micro which gives a lot of power and flexibility. So, with the PCBs ordered, I jumped to eBay to get the rest of the components. Obviously, a lot of LEDs were needed so they were first, I needed a pro micro to run the system, and the other main component were MAX7219 chips. Now, if I was to source the chips from the UK they would have been in the order of £9 each. eBay had them for a tenth of that price. These were pretty certainly cheap knock offs, but for that price I could order way more than needed and suffer a few DOA chips.

Of course, it wasn’t that straight forward. I didn’t realise just how close the LEDs were packed on the PCBs which meant I needed flangeless LEDs. Needless to say when I received the LEDs from eBay they had a flange on the dome which meant they would not fit. Hunting around in the forums, I found a possible source of LEDs from China that were definitely flangeless. So, re-order and wait.

Whilst I was waiting for the parts to turn up I hit a bit of luck. Probably the hardest main part to make myself was the dome. There are lots of different options for these, from aluminium to styrene or fibreglass. The runs for these are fairly infrequent, especially if you want a certain type of dome. I’d initially ruled out building my droid in aluminium due to cost and the fact I’ve never worked with metal before, but someone on the UK builders Facebook group mentioned they had a dome and a set of body skins available in aluminium. It was too good an opportunity to miss, so I bit the bullet and bought them. A couple of days later they turned up!

IMG_0136_CR2_embedded

This was scary, this was starting to be a large commitment. It is fun tho, so lets carry on!